Showing posts with label stamping. Show all posts

Thursday, May 23, 2013

My Favorite Nail Art Technique

My chosen technique for the Crumpet's New 31 Day/Slow Nail Art Challenge is stamping. I'm not the swiftest at freehand, tape manis make me nervous (always waiting for half a nail's worth of polish to pull off with the tape...), glitter/jelly/crelly sandwiches by themselves are great when I don't have time for art...but stamping is easy, looks professional if done right, and with just two sets of stamp plates (Bundle Monster 2012 and Mash 26-50), I will never run out of color/design combinations!

For my stamping, I had a few goals: 1) Use pink––I have a lot of pink polishes, but hardly ever use them. 2) Use an untried––this polish is a franken I made called So Sari, a shimmery hot pink with loads of orange, hot pink, and gold glitters. 3) Use a polish I'd never stamped with before––I totally thought Sinful Colors Endless Blue was pigmented enough to hold its own as a stamping polish. I was sort of right; it shows up very well, but is slightly sheer so the base color here tinted it purple. Which was OK, as I was trying to decide between blue or purple stamping! 4) Use a stamp image I'd never tried before––I always think these bold geometrics are not my style, and end up loving the looks on my fingers! This is BM-305, by the way.

I was really happy with how these turned out!

Friday, April 19, 2013

My oldest untried (AKA stop while you're ahead!)

Day 18: Your Oldest Untried

Seeing as I've been working my way through untrieds and seldom-used polishes through this whole challenge, and I've been finding beautiful swatches on other blogs of new polishes I can't afford and then frankening something similar, I had to really think about what was my oldest untried. I'm pretty sure it's a franken I made before I discovered that Born Pretty store glequins are NOT solvent-resistant. The polish is a black jelly with holographic and red micro glitters and what were supposed to be red glequins. Alas, before I even had time to come up with a cute name, the glequins bled, lending a reddish cast to the jelly (not bad—interesting, in fact!) and bleaching the glequins down to a peach shade.  I had been thinking how devilishly beautiful black and red can appear, and since this was not quite so intense and/or disastrous as the bleed could have been, I named it "It Could Be Worse."

I was careful with application, as those larger glitters could have proved fatal to a nice clean-up. I was surprised by the depth of the polish, and quite pleased. Alas, that's where it all went wrong. I really thought Kleancolor Metallic Red would be strong enough to show up against ICBW, but no. The full nail lips image I stamped using BM-303 isn't even recognizable on my nails. I ended up with it looking sort of like a Saran Wrap mani. OK, I thought, maybe a diagonal tape mani with a thick coat of Sally Hansen Xtreme Wear Red Carpet? Uh...no:
Definitely NOT enough contrast.

A close-up of all the glittery goodness beneath the sad screw-ups.  Smiley

I will definitely be using ICBW again, but with silver as a topper or just alone to show off the depth.

Thursday, April 18, 2013

My First Feather Mani

Challenge day 17 says "a new technique to you"...I'm far from a grammar expert, but wouldn't "a technique new to you" sound better? Hmmm.

Anywho, I decided to try a feather manicure. Thank you, my 10 sweet chickens, for dropping some really pretty feathers for Mom (me) to use! My base color here is a franken I call "The Rain Kept Falling in Love", because my oldest and I are sort of on a mission to name as many of my frankens as possible based on 77s songs. I followed The Nailasaurus' tutorial here for the real feathers, and then stamped the feather image from Mash 29 using Orly Buried Alive.


I think I liked my right hand the best! This technique was a lot easier than I thought it would be, and I was happy that the blue base contrasted with/complemented the feathers so well.

Wednesday, April 10, 2013

I ♥ Stamping!

Day 14's challenge was stamping...ooh, my favorite nail art technique! 


It's so hard to tell from the picture, but this was actually a jelly sandwich under the stamped vines. I used Pure Ice Free Spirit as my base color—not a jelly, but I wanted a firm foundation for the color! I added Sinful Colors Call You Later over that, and then added Nina Ultra Pro Pucker Up atop it. Pucker up is a neon duochrome sheer, so it's sort of jelly-ish in its translucence. I stamped with BM-312 and Konad Special Black. I loved how crisp the vine image came out!

Friday, April 5, 2013

Cheery Mani

Challenge Day 13 calls for a cheer-yourself-up mani. I've been itching to use both my Zoya Robyn and the spring images on BM-302. I couldn't decide between the bunny and the full-nail image of birds, snails and...what are those? "Suessian" trees? So I went with both in a skittle mani.


Obviously, Robyn is my base color, except for Kleancolor Metallic Fuchsia on my pinky. (It's much more metallic IRL, and so beautfiul!) I stamped with Konad Special White, and then used Sinful Colors Snow Me White, Sally Hansen Insta-Dri Lightening, and the fuchsia for the dots, stripes, and flower on the bunny nail. I couldn't figure out how to incorporate the accent/art colors into the full-nail stamp image, which is really the only thing I didn't like about this look.

Friday, March 22, 2013

Geometric Nails

I was looking forward to Day 10: Geometric, because I tend to gravitate toward more organic shapes and don't utilize all the great techniques for creating geometric patterns on nails. I contemplated some form of tape mani, but since that's actually the next challenge and I haven't had much experience with tape manis, I went with some simple stamping. I've known since I brought OPI Ski Teal We Drop home from Hilton Head that I wanted to use it for this day's challenge, paired with silver squares/rectangles.

This past summer, my oldest showed avid interest in my nail art hobby just long enough to convince me to start her a small collection of polishes, whereupon she gave up quickly and I inherited her teeny stash. This was my first time using Wet 'n' Wild FastDry Silvivor from that stash; I could tell from the bottle it was more glittery than my solidly chrome Sally Hansen Insta-Dri Silver Sweep. When I stamped with it, the result came across as more grainy looking than Silver Sweep; not necessarily a bad thing, just different.


The deep teal of STWD was difficult to capture with my camera, but I think these shots pretty accurately show it. I really like it paired with the jumbled rectangles and squares of BM-320. I must have ginormous thumbnail beds, though, because you can see below that the full nail images don't quite reach the edges of my thumbnails. Still and all, I'm in love with stamping and the not-quite-complete thumb stamping is only really obvious when I slap a macro shot on here!

Thursday, March 21, 2013

St. Patrick's Day Nails

Yeah, yeah, everybody else showed off their St. Paddy's looks before the 17th. My manis always get posted days and days after they're on my fingers. There you have it.

Day 9 called for a saran wrap mani. I've had about a 50% success rate with this technique, apparently due to the fact that what is in my head doesn't always translate well into real life. As was the case with this one, of course...

I started with Petites Lime Freeze as my base color. I can't decide what I think of this polish. Far from being lime, the color is such a delicate, shimmery celery green, but it's too sheer for my taste. It wasn't going to matter much here, though. I covered it with a layer of a homemade franken (Verdigris) and then "saran wrapped" it off. So far, so good: good contrast, same color family.

Here is where my RL mani began to deviate from my imagined one. I really wanted to attempt some freehand shamrocks, and I really wanted to stick with the challenge, and I really thought Kleancolor Metallic green would show up against the mottled background. Uh, so much for reality. Let's just say it didn't; let's just say it looked like a leprechaun had pooped on the grass.Green Smilies

 Time to salvage this mani! I ended up doing another layer of saran-wrapping with the Kleancolor, which pretty much hid Verdigris, but I didn't care anymore. I decided to top it with a coat of Sinful Colors Call You Later, a great green and gold glitter topper. Final result:

My fingers look ridiculously red here. Not true to life, not even the way they looked on the computer I used to edit. Whatever.

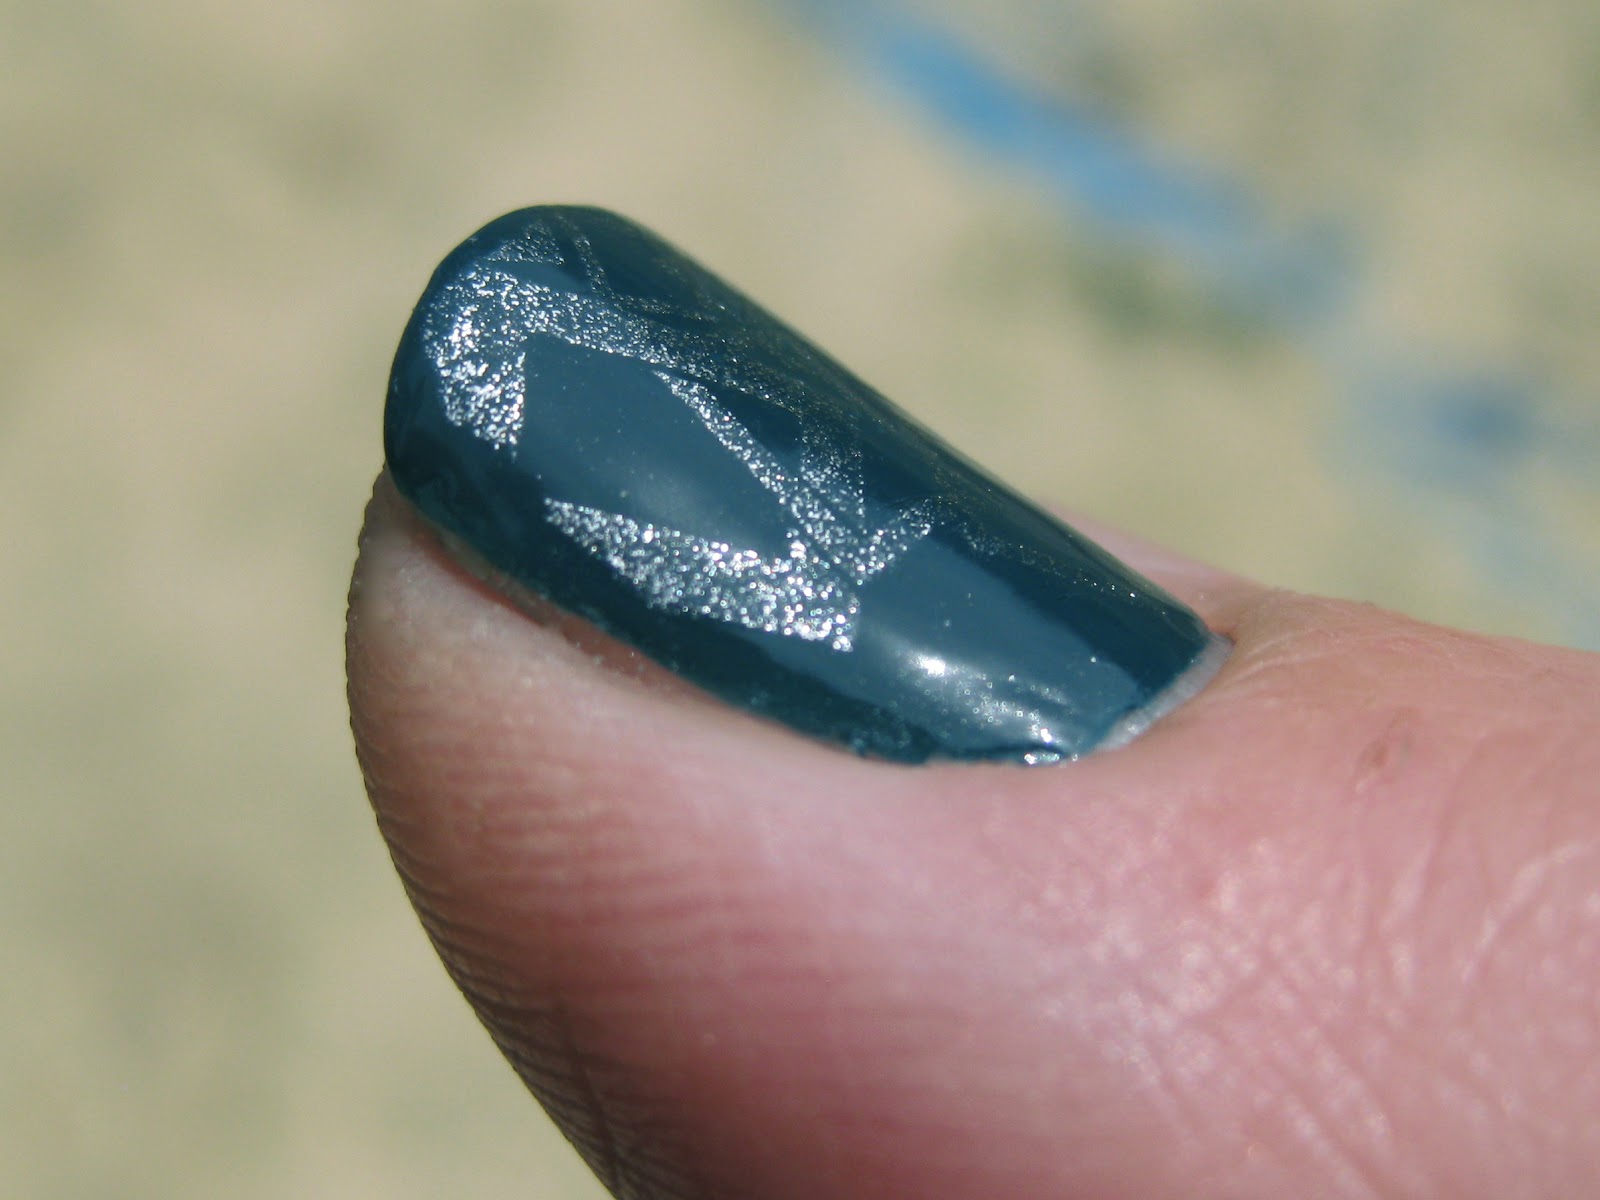
Close-up of right thumb to see the saran wrapping and glitter a bit better.

In the sun. Man, oh man, is that Kleancolor Metallic Green bright!

I left the look alone for 24 hours, then jacked it up with some black flames from Mash-48, chosen by my elf of an almost-seven-year-old. Pic is blurry because I couldn't be bothered to wait until morning to get an outdoor shot. (If nothing else, I stand a chance of getting some award for Laziest Nail Blogger with the Crappiest Photos!)

Wednesday, March 20, 2013

My first Zoya!

I had done a mani for Day 7 before I left for Hilton Head, but in the hoopla of getting six people out the door, I forgot to get pics. It was pretty spiffy, I thought! In honor of the beach trip, I chose a gradient with L'Oreal Walk on the Beach and Sinful Colors Mint Apple with a coat of Pure Ice Busted over the top. It looked like the ocean washing up to the shore, with the beautiful lavender sparkles of Busted like the sun glinting off the sea and sand. Alas, no documentation, and I just didn't feel like repeating it when I came home from the beach. Why? Because the bestest husband ever let me pick out my first two Zoyas and an OPI at Ulta on the island. Woohoo! I got Zoya's Robyn and Jem and OPI Ski Teal We Drop.

So, for Day 7's Gradient, Ombre, or Skittle, I ended up with this skittle featuring Jem. The accent and stamping are with Color Show Bold Gold—have I mentioned this polish is, in my opinion, only good for stamping?! Check out the streaking and bubbling on my ring fingers.


Please also note the wonky stars on my right index. This was my third DOOVER of that finger; I could not get that darn image to stamp on that finger for all the tea in China! And my right pinky image isn't centered, but by that point, I didn't give a flip.

This shot is solely for the purpose of showing off the gorgeous pinky-golden flecks in Jem!

It's late, hubs is waiting on me to watch a movie with him, homemade mocha ice cream is calling from the kitchen, and I can't be bothered to list all the stamp plates. Smiley Cheers!

Friday, March 15, 2013

Lilac Skittlette

Day 5 is purple. I had a delicious, el cheapo (dollar store!) Donna Michelle unnamed creme waiting to be used and I wanted to try a skittlette mani. I stamped with Wet 'n' Wild Wild Card on index and middle with...I have no idea now what that image is! I used a thinned-down striping brush and Wild Card (doesn't show up much in this pic), Wet 'n' Wild Megalast Disturbia and Sinful Colors Snow Me White on my ring finger, a violet Born Pretty Store jewel on my pinky, and a dot-and-drag hibiscus and dots accent in Snow Me White on my thumb. I really like how this came out!


Ballet Pink Nails

I actually did these back in February! I had a week of insane busyness getting ready for a week at Hilton Head (the beach in winter is the BEST!), then a week of vacation, then I have been desperately trying to get things back in order around the house since we got home five days ago! Someone please explain to me how four changes of clothes for six people equals six loads of laundry at the beach AND a behemoth-sized mound of laundry still to do when we got home. Anyway, that's why I haven't posted in a while, so on to the nails...

Day 4 of the Crumpet's Slow Challenge (even s-l-o-w-e-r here) calls for pink. I'm not much for pink, but it's better than gold! I know a lot of reviewers call Orly Decades of Dysfunction creamy off-white or some such, but my bottle leans very much toward pink. A pale, porcelain pink, but pink nonetheless. It reminds me of ballet slippers, tights, and leotards.


I wanted to also use a glitter that I hadn't used in a while, so I chose Pure Ice Spit Fire, a beautiful mix of tiny pale metallic pink and holo glitters. After that coat I was really feeling the ballet costume vibe, so I took a chance and stamped a crosshatch pattern from BM-315 using a frankened light pink metallic polish I cheesily named Pink Porsche.  It showed up better than I thought it would, completing the idea in my head of a sheer, glittery ballet tutu over tights. Yay!

Friday, February 22, 2013

I will survive having gold nails!

Ah, no, I'm not a big fan of gold. Not in jewelry, not on my fingers. For Day 3: Gold, I was tempted to pick a fave color base and use gold as the stamping polish or glitter or whatnot, but in the spirit of sticking to untrieds/frankens/hardly used polishes, I decided to go for a base of China Glaze Rare & Radient. I get the flashes of green in this duochrome, but I mostly see the old gold color. I discovered two things about this polish: 1) It applies SO much better than Maybelline Color Show Bold Gold (which drags big time), and 2) other bloggers are not kidding when they say it's "brushstrokey". I need to remember that for future wear, because I will definitely try wrapping my tips BEFORE I paint each nail, rather than after, because the blackish undertone of this polish seems to make the wrapping of my nail tips show up glaringly. (The dark spot on my pinky is just a shadow.)
I stamped the rose full-nail image from BM-323 with Nina Ultra Pro Brandywine. God alone knows how old this polish is! I've had it for about 5 years; it came in a cardboard box full of polishes my hubby's aunt bought off someone at the flea market! Works like a dream, though it's so old and I hardly ever use it.

I'm keeping these dadgum gold nails on for three whole days! Two is about the max I can stand for colors/manis I don't particularly like, but if I hold off until tomorrow night to redo, I'll have a nice, fresh mani for church on Sunday.


Tuesday, February 19, 2013

Black and White and Beautiful All Over

I started a new challenge right away, solo and at my own pace, of course. I thought about a break between challenges, but I think the "rules" help me to branch out from using just my favorite colors all the time. I'm trying to go through this challenge using all untrieds or polishes I've previously only used for nail art or on one nail for a skittle.

The first day is Black and White. I love black polish on my nails; I think it looks elegant rather than goth, especially as a backdrop for some nail art. I've seen all sorts of beautiful art done with the paisley image from BM-315 and have been looking for the perfect opportunity to use it. So, here it is:

I was a little frustrated to see that I didn't aim right on my left thumb; Bundle Monster 2012 full-nail images just barely cover my wide thumbnails when I do get it lined up perfectly. Other than that, I was pretty happy with this. My base colors are Sally Hansen Hard as Nails Black Heart and my one and only OPI, My Boyfriend Scales Walls, which is thin and streaky, but well worth 3 coats because of its tendency to look white without being glaring. I stamped with Konad's black and white stamping polishes. I thought this design was eye-catching yet not obnoxious!

Friday, February 15, 2013

Imitation is the Most Sincere Form of Flattery

Or so they say. For "Inspired by a Tutorial" on Day 30, I chose to attempt the spun sugar look I watched xoxoalexisleigh demonstrate here. I combined this with some Valentine pink hearts, saving the spun sugar for my accent nails becausedang!—it takes F-O-R-E-V-E-R. Looking  back on it, I wish I'd used a second pink rather than the blue; I picked blue because I was originally going to use a frankened jelly-sammy-in-a-bottle for the other nails that contained some blue glitter. Oh well.

My hands look terrible here! That is not actually skads of dry skin clamoring for hand cream; I'd just finished waxing a piece of furniture that I'd painted with DIY chalk paint (this blog has terrific instructions and loads of info on a fabulous technique!) and the wax dried on my hands. I didn't even realize it until I looked at the pic...after I'd taken this polish off and couldn't get a better pic, of course.

My base color is a franken my youngest asked for and named, a bubblegum pink creme with teeny holo glitter called Pink Ocean. (She's precious, but corny.) I stamped over it with China Glaze Fly and BM-317. My accent nail is a beautiful, squishy, unnamed raspberry red jelly from Donna Michelle I scooped up at the dollar store. (I bought it to franken with, but I'm kind of in love with it the way it is.) The strings of polish atop it are Fingerpaints My Art Belongs to You, Sinful Colors Snow Me White, and Pure Ice Calypso. As fun as this look is, just doing both my ring fingers was a pain in the tukhus! Stir, stir, stir, stir, stir. Stretch, stretch...you get it. Too little bang for my buck, effort-wise. So, if I EVER feel like wasting that much time for that little result, it will still be accents only!

Fairies on my fingers...

Day 29's challenge was "Inspired by the Supernatural". I am NOT AT ALL into creepy supernatural stuff, so I was leaning towards doing something that reflects my faith in Christ. But I could not think of anything at my skill level that would classily depict that. I went with something cute and sort of silly: fairies. This mani wasn't all that fabulous, mostly because it didn't show up that well on the black background.

I started with a base of Sally Hansen Xtreme Wear Black Out, the most miserable, thin, streaky black creme I've ever owned, so I had to use two coats. I topped it with a coat of Wet 'n' Wild Fast Dry Hannah Pinktana and pressed a few holo silver hexes from the dollar store into it. I stamped a flower in Kleancolor Metallic Purple and a butterfly (just half the image on my ring finger) in Kleancolor Metallic Fuchsia from whatever Salon Express plate (can't be bothered to go look). I painted a head, arms and legs in Nakey Nana (a homemade franken named for my littlest's beautiful skin), a dress in Color Club Worth the Risque, and hair with Kleancolor Metallic Yellow.

Pardon the carpal tunnel wrist brace. Couldn't be bothered to take it off!

Awkward angle of my ring finger, trying to show the edge of the flower and the side view fairy w/o too much glare!

Back view of a fairy reaching to touch a flower. This shot almost totally disguises the flower, but it does extend to the right side!

Not my best ever, for sure.

Irish Nails!

Yet another challenge I was a bit stumped by was Day 28: Inspired by a Flag. I'm not a patriotic person, and the American flag seemed too complex for my skills, anyway. I got to thinking about my Irish heritage (among all the other things I'm a mix of), and the fact that my oldest daughter is completely enamored of everything to do with Ireland. So, I picked the Irish flag, a fairly simple one that is nice and bright:


I gave all my nails a coat of Sinful Colors Snow Me White, as three of my nails would have white, and the other two colors I chose are rather sheer.  I topped the white ones with Finger Paints Well-Cultured Pearl, my index with Sinful Colors San Francisco, and my ring finger with Pure Ice Hot Tamale (I find myself falling back on that particular orange quite a bit!). For my thumb, I pulled apart some Born Pretty dried flowers and rearranging them to look like four-leaf clovers. And in honor of the legend about St. Patrick chasing all the snakes from Ireland, I stamped the snake image from Mash-50 with my frankened green stamping polish and then carefully painted the universal symbol for "no" or "forbidden" or whatever in black. Pretty cute, I think.

Saturday, February 9, 2013

Inspired by a Pattern


My first thought when I saw "inspired by a pattern" for Day 26 was some sort of clothing pattern: floral, plaid, stripes, polka dots, houndstooth check, ... But when I Googled "pattern", this image popped out at me:


Oh, I love it. Nothing too original, but this green is beautiful! Not too hunter-ish, not too emerald, and I love the swirls peeping out from behind the snowflakes. And here in SC, man, do I wish we got more snow!

I don't have this green in my arsenal; the closest thing I had was Sinful Colors Rise and Shine. The label on the bottom says matte, but to me it seems to dry looking a bit like all those spiffy rubber finish polishes I've seen on blogs. The closest I could get for the swirls was to stamp Mash-40 with a shimmer over that rubbery goodness, as I was not in a million years going to keep mixing little dots of Rise and Shine with just a touch of black to get a darker green. I used another Sinful Colors polish, Gorgeous. Oh man, I was tempted to stop there with the swirls. I've never done a tonal stamping mani before, and it was so elegant. But, further up and further in! I stamped with BM-323 and (yet another) Sinful Colors Snow Me White.

I had a hard time capturing the swirls. I can see one glinting on my thumb and the darker effect I was looking for on the other fingers in the first pic, and all shimmering a bit behind the flakes in the second pic. Not too bad for someone who is determined NOT to buy a new polish every time I don't have the exact color in my stash.

Tuesday, February 5, 2013

Swirly Goodness!

I was looking to use colors I don't wear much for this mani, and I'm not a big fan of pink or yellow. I didn't want to rob these colors of their rightful share of well-planned time in the spotlight Smiley, so I spent some time contemplating what to do with two colors I don't like much. This turned out to be fun, and easy, and all that I imagined in my head! Sinful Colors Jamboree, topped with a coat of Kleancolor Metallic Yellow that I then "Saran-wrapped" off to get a cool splotchy effect. When dry, I stamped the swirls from Mash-40 with Konad Special Black. My accent nail is Sally Hansen Hard as Nails Black Heart topped with Kleancolor Chunky Holo Black. Another mani I could not stop staring at! The pic is hurry-blurry, and you can see edge wear because I'd had it on for two days before I remembered to take a pic, but I think the swirly goodness is still obvious!


Thursday, January 31, 2013

Wingfeather mani

Day 24 was "Inspired by a Book". I based my manicure on Andrew Peterson's On the Edge of the Dark Sea of Darkness, book one of the Wingfeather Saga. My oldest's best friend introduced us to this series of books, and we all have been enjoying them immensely! Andrew Peterson is a brilliant writer, in my humble mommy opinion. His books are beautifully written kids' fantasy novels that are just as entertaining for adults. They are super-clean without being cheesy, full of adventure and good v. evil clashes as well as ordinary human interaction made intriguing by his elegant style. Think I like 'em just a little?

Here is a summary of the story, and here is my nail art representation of it:

Index: Janner, the main main character, is a writer and Throne Warden responsible for the safety of his brother. I stamped BM's "love" image onto cream for this. Middle is Leeli, Janner's sister, blue for the sadness of being crippled by the enemy, vine's with lavender flowers for her crutch, and a musical note for her role as Song Maiden. Ring: Janner's brother Tink (Kalmar) is the young High King of Anniera and an artist, so here is a drawing of a tree with a calligraphy-style pen. My pinky is for Peet the Sockman, a homemade peach/nude polish topped with white and red stripes for the sock and a black V to represent the claws at the end of his arms. My thumb is symbolic of the powerful sea dragons.

And this hand: Cream with just the bottom portion of the "love" image for Oskar Reteep and his love of books/knowledge on my pinky. Ring: green and a muddy gold for the Fangs of Dang. Teal jelly and turquoise glitter sandwich stamped with waves for Janner's grandfather Podo, a salty old sailor. Index: royal blue with a (faint) crown for Janner's mother Nia, queen of the lost kingdom of Anniera. And lastly, cream with big pawprints for Leeli's pet and protector, Nugget.

 The sea dragon nail is my favorite. I love this Sinful Colors Kissy, an amazing teal loaded with turquoise glass flecks, topped with Color Club Worth the Risque, although the holo of this stamped image doesn't photograph well.

My least favorite is the "Nia nail". Kleancolor metallics are beautiful, but bleed/seep through any image stamped on them! The crown was originally gold, and I was so proud to get it centered well, but as soon as I topcoated, the crown faded. It's not a total loss, as I think the faded crown could represent the fact that Nia is queen of a country that no longer exists.

Saturday, January 19, 2013

Self-Made Mani

Day 22 is Inspired by a Song.  I picked "Self-Made Trap" by the 77s, my favorite band of all time. I could gush for hoursdays, maybeabout Mike Roe's genius, the double-edged sharpness of his word play, and his versatile voice. But this is not a blog devoted to the 77s. (I do feel it only does them justice to point out that their music pulled me through a couple of the darkest times of my life and renewed my hope and faith in God in really miserable circumstances.)

The song I chose is "Self-Made Trap" from the Pray Naked album, about all the ways we refuse to give up our sin and the guilt we experience rather than allowing God to free us from our crap. I struggle with this in a million ways every day, and this song helps me to see the truth and feel comforted, as well, remembering that my experience is common to the human race.

So, on to the nails! I chose as my base color Sally Hansen Xtreme Wear in Grey Area partly for the pun on the fact that there are no grey areas when it comes to sin, and partly because the greyish-brownish-purplish color, while beautiful, is also sort of dreary and well represents the theme. I stamped my pinky with a netting pattern for "tight nets, I weave all I can get", painted lips (kinda wonky ones) and stamped a key on my ring finger and freehanded steel stripes on my middle for "I grip the bars, swallow up the key", stamped barbed wire in silver on my index for "It's like serving time when there's none left", and lastly, for the last line "The die is cast, the word is no", I painted dice—notice that the two dice on each thumb add up to seven!


Here are the lyrics straight off the 77s' website:

Self-Made Trap
from the album "Pray Naked"

(Mike Roe/Mark Harmon)


i'll beat the rap for a self-made trap
get all tied up in endless crap
quicksand, i planned
pitfalls, i dig 'em all

self-made rope
and self-made binds
i'm all wrapped up
in a sour grape vine
a human web,
i've spun every thread
tight nets, i weave all i can get
a rats maze wouldn't faze
brick walls, i'm enthralled

self-made traps, self-made snares
handicaps and wheelchairs
drown myself in rain,
freeze myself in snow
help comes fast, pride goes slow
could be free if i choose
born to win, dying to lose

self-made twine,
hand-made chains
i'm all bound up and self-contained
jail cells, i build well
lions dens, i got a yen
land mines, i design
avalanche, i wouldn't blanch

self-made traps, self-made snares
handicaps and wheelchairs
drown myself in rain,
freeze myself in snow
help comes fast, pride goes slow
could be free if i choose
born to win, dying to lose

the warden comes to set me free
i grip the bars, swallow up the key
it's like serving time
when there's none left
on a fast train nowhere
but we're not there yet
the scenery moves
the train stands still

dungeon dark,
i'll quench every spark
a hangman's noose,
never leave 'em loose

self-made traps, self-made locks
combinations i forgot
for guards and gates i await
i'm a natural born inmate
could be free if i choose
born to win, dyin' to lose
lust came fast, love left slow
the die is cast, the word is no

© 1992 Fools Of The World, LTD. (ASCAP)

Saturday, January 12, 2013

Stamp "Marbling"

I have a love/hate relationship with water marbling. Some of the first nail art I ever did was water marbling, and I loved it. But the prep of taping around my nails is a pain in the butt, as is cleanup whether or not one chooses to tape off areas. I've heard others say applying cuticle oil to the skin around the nail helps w/ cleanup, but I'd end up getting it on my nail, I'm sure. When I did my birthday/Xmas mash-up I stumbled onto the idea of applying lip balm around my nail and all over that section of my finger up to the knuckle. I still had cleanup to do right around the nail, but the rest of the marbling "leftovers" gooped up and pretty much just wiped off my finger!

My other issue with water marbling is that I seem to have a difficult time getting the drops of polish to spread effectively. I know all about room temperature water, distilled v. tap, how some polishes will work and others won't... I just keep having the first few rings spread beautifully, and the inner few NOT spreading. Maybe I need to drop from a little higher up?!?!

So, any-who, I decided to be a big, fat CHEATER for Day 20: Water Marble and use my BM-320 plate to stamp a marble-esque design. I just don't feel the love for this one. I didn't when I used it here, either. And what's up with the fact that I chose such a similar color scheme this time? Grrr.

This time around, it's Kleancolor Metallic Fuchsia over an unnamed freebie from SillyLily. It's a milky white (or pale, pale pink?) jelly polish with fuchsia and turquoise hexes and teenies and white shards. It's not my favorite, requiring 3 coats for the milkiness to disguise the stains on my nails sufficiently, but that's just a personal pref.

sunlight

My thumbnail isn't jagged; I think the dabbing to get glitter where I wanted it gunked up parts of the tip more than others.

flash (and horrendous glare on my thumb)

The combination of guilt over cheating and my unhappiness with this look makes me want to attempt real water marbling tonight. We'll see... I did end up wearing this for three days, because 1) I wasn't going anywhere that I cared who saw it, and 2) all my kids loved this one. Little weirdies. Smiley